Home Blog Page 9

Writing can help clarify and polish your VISION!

0

Background: Take some time-off and write/publish Blogs.

This is going to be my first article on Linked IN, so I will try to make it concise.

We know technical resources in the field of Information Technology are extensively involved in various projects and deadline tasks on daily basis and hardly get time out of their hectic schedule for anything else, even interaction with family and friends gets rare with time; sometimes it’s the extent of involvement and passion to accomplish certain technology or domain knowledge which decides when you take time out from work.

In addition to this present-day technology has introduced various diverse tools in the form of mobile apps on smartphones/tablets and other gadgets which keep us engaged with work-environment even when we’re miles away from workplace. In my opinion every now and then (may be once in a month or two) we should at least take some time-off from our stressed work schedules and use the same tools to write articles and blogs.

Writing can give you clear VISION:

Yes, Writing articles & blogs can help one clarify goals and focus thoughts at times and clarify VISION.

From writing; I mean to convey what’s in your mind into an article or blog that purely represents yourself. I can be simply an idea, observation, concept, positive suggestion or just any variant of your thinking etc. in you’ve to do some brain-exercise. It doesn’t mean to open Google or any other search engine and look for results to copy/paste & post. In case if you had to depend on search engines to get some content or inspiration then always try to give credit to those who should be recognized of their thoughts.

I know it will be hard initially to take some time-out, but if you develop a practice of writing articles/blogs in some kind of frequency, it will help you to think (and get clarity) about your direction of life, where you are going towards or being dragged.. and where you wish or want to go!

Some basic guidelines to review:

Well you can get various articles online that can help you guide how to format and distribute your content into various meaningful section while blogging, I would like to give some guidelines from my experience:

1- Everyone should have a GOAL with some milestones in life; similarly there has to be a goal or purpose while writing something, without setting a goal we can’t get focused and our work or life will be governed by external factors/demands/influences more than ourselves.

2- Obviously before writing something, one should be a good reader as well. Reading doesn’t merely mean to start at the beginning and going through word-by-word; one can adjust reading pattern and behavior and adapt various reading strategies.

3- Try to write in the field you belong to or have practical experience in, this will help you write about something you know. One of the many reasons I started writing is; I used to find lots of articles with incorrect or irrelevant information in them, so I thought I should write on the same topic myself with my angle of view and add the key points I felt were missing.

4- It also helps in beginning, if you try to ask someone in your colleagues or friends to review your writing and give you suggestions for improvement.

So I urge readers to start and try to make a habit of writing articles/blogs; do not hesitate from mistakes or how much time and editing you may have to put in or how people will criticize your blogs, trust me if that happens it will give you more chances to polish yourself in lesser-time.


Thanks and Peace,
Nabeel Shahid (SABIT SOLUTIONS)

An insight to Employee Motivation (building Team Spirit) for effective Managers!

0

Employee motivation (Intrinsic motivation) can be one of the challenging tasks for an effective Manager; it needs continuous efforts and inter-personal skills in order to truly motivate your employees or a team of resources as motivation doesn’t last long.

Keeping your employees organized at work can be achieved through a process-oriented approach, but getting employees engaged at work and evolving a sense of interest in employees at work requires different level of skills and efforts.


Motivation

Motivation Generates Quality:

Motivation drives quality of work, no matter how much talented or skillful your employees are but without true motivation they cannot produce quality work at regular intervals. For an effective manager creating quality work is an excellence, now the definition of quality work various depending to job role and industry.

Is it a One-Time Job?

Motivation is not a one-time job, it needs continuous efforts and requires re-evaluation after a while with time. With the changes in employees’ life (lifestyle) or level of maturity or experience; factors that motivates an employee are most likely to change, so an effective manager needs to keep re-evaluating these factors that can help his/her employees motivated at work.

There may be many tips and tricks for a manager to help achieve employee motivation, but I’m just putting some of them based on my experience.

1- Share the BIG picture

Sharing the BIG picture with employees help them visualize how they are contributing to organization goals. Obviously not all employees can grasp it clearly but that doesn’t mean that managers hide the BIG perspective from employees or teams. To perform better employees need clear correlation between their efforts and objectives (success) of organization.

This doesn’t mean that Managers keeps on discussing the BIG picture in each and every team meeting with employees; it just needs to be shared with employees but not a recursive topic as it will de-track them from short-term goals or project milestones.

2- Discuss Combined goals and achievements as a team

After organizational goals, managers should also discuss team goals and achievements with employees; to clarify where they all stand as a unit (team).

Not all employees perform same; every employee has it’s own capacity and motivation level that drives him/her at work. That is why to effectively manage employees in a team instead of selecting an individual employee’s failure, managers should discuss failures as generic as possible in a group discussion or team meeting. In addition to this replacing the words like “I“, “You” with “We” really helps in communication with struggling team members.

3- Focus on leadership by setting examples, instead of micro-management

Due to time-constrains, when results are not coming up as expected some Managers switches to micro-management mode to control efforts of employees. To me micro-management is not an efficient way of dealing with situations; rather it can bring long-term effects and dis-satisfaction in employees.

Micro-management brings negative impacts and restricts an employees growth as well, spending more time with employees and inspire them with leadership and initiating of sense competition among employees is a better approach to solve various issues.

In addition to this, it’s important to evaluate employee motivation level and issues using one-to-one meeting sessions and address them accordingly. Obviously Managers in their role cannot resolve all kind of problems, but by using their experience managers can help employees guide and if required become a bridge by putting relevant issues to next level for resolution.

4- Be transparent to employees

Effective Managers are transparent to their employees to gain trust. False urgency or deadlines are a huge deterrent to morale and easy way to lose credibility. Sometimes with being transparent with employees; Managers also needs to be flexible..in today’s world, a modern workplace can be mobile and virtual, which gives tremendous opportunities for companies to scale without expanding office locations.

So for an effective managers, first it’s important to find out what factors motivates each employee or team member, then apply above generic suggestions to keep them motivated in order to product quality results.


Thanks for reading,
Nabeel Shahid (SABIT SOLUTIONS)

SQL Server Machine and AntiVirus / AntiMalware and other malware scanning applications.

The purpose of this article is to enlist recommended items that needs to be excluded from AntiVirus or AntiMalware scanning software’s on server machine where Microsoft SQL Server is installed.

This can also help improve the overall SQL Server performance, these items will apply to both realtime and on-demand scanning schedules configuration.

1. SQL Server Data & Log Files (You need to look for files with extensions like .MDF, .NDF, .LDF)

2. SQL Server Backup files (You need to look for files with extensions like .BAK and .TRN)

3. Full-Text Catalog Files (This is the FTData folder in the SQL Server installation path, located by default at \Program Files\Microsoft SQL Server\MSSQLX.X\MSSQL\FTData on the SQL Server installation drive)

Please do check each MSSQLX.X folder, there will be multiple FTData folders which need to be excluded from antivirus scanning

4. SQL Server Analysis Services Backups Files (Recommended is to exclude entire Directory that is holding Analysis Services files that is used for processing Cubes)

Note: If Analysis Services are not configured, the OLAP folder will not be present.
These locations contain the Analysis data files, Analytics temporary files, Analysis Log files and Analysis backup files. The default locations for these files on the SQL Server installation drive are:
\Program Files\Microsoft SQL Server\MSASX.X\OLAP\Data – Analysis data and temporary files.
\Program Files\Microsoft SQL Server\MSASX.X\OLAP\Backup – Analysis backup files.
\Program Files\Microsoft SQL Server\MSASX.X\OLAP\Log – Analysis Log files.

5. Trace/Profiler Files (You need to look for files with extensions like .TRC)

6. SQL Server Query Files (Extensions like .SQL)

7. Exclude SQLServer.Exe file, ReportingServicesService.Exe, MSMDSrv.exe application files

  • %ProgramFiles%\Microsoft SQL Server\MSSQL10_50.<Instance Name>\MSSQL\Binn\SQLServr.exe
  • %ProgramFiles%\Microsoft SQL Server\MSSQL10_50.<Instance Name>\Reporting Services\ReportServer\Bin\ReportingServicesService.exe
  • %ProgramFiles%\Microsoft SQL Server\MSSQL10_50.<Instance Name>\OLAP\Bin\MSMDSrv.exe

8. Cluster Directory (Usually it is C:\Windows\Cluster)

9. SQL Server Audit Files (You need to look for files with extensions  like .sqlaudit)

Thanks for reading,
SABIT SOLUTIONS

Prepating Development Envrionment for Andriod Development

What’s Android?

Android is an open source mobile operating system released under the Apache license, it in market from around 11 years now. OS is powered by Linux kernel, most of the code, libraries and API’s etc. are written in C and application software runs on open-source java implementations/frameworks.
For more details visit: http://en.wikipedia.org/wiki/Android_(operating_system)

Developers who already have experience coding for iOS (iPhone/iPad) needs to consider that there are millions of devices that runs different versions of Android OS, there is also isn’t any standard screen size; you will have to optimize the app for screens ranging from 3.8” to full 9.7” tablets.


Preparing Development Environment for Android Development

So do you want to know what you need to start Android Apps development? 

Here’s the quick reference to download and install necessary tools that will help us create apps easily.

1-      First we need to install Java (JRE and JDK)

Java Standard Edition Software Development Kit will work, you can download it from this link and select specific version based on your O/S http://www.oracle.com/technetwork/java/javase/downloads/ SELECT Only Java Platform (JDK)

 http://www.oracle.com/technetwork/java/javase/downloads/jdk7-downloads-1880260.html

SELECT your O/S Linux, Windows 32-bit or 64-bit versions. MAC O/S already has this pre-installed.


2-      Download Eclipse IDE

Eclipse is an Integrated Development Environment (IDE) that will help us do programming in managed way and gets things easier.

Go to http://www.eclipse.org/downloads/

SELECT package for Linux, Windows or MAC OSx etc. And download Eclipse IDE for Java Developers from the above link for required O/S.


3-      Install Android SDK and setup AVD.

Android SDK (Software Development kit) will allow us to use structures, methods / objects that are specifically designed for Android. And AVD (Android Virtual Device) will help us test our Android applications on a virtual device (emulator) which really helps if you don’t have an Android device at hand. Through AVD you can test your apps on many types of devices to evaluate how our developed applications will run/behave.


If you have successfully installed Eclipse you open Eclipse > Help menu > Install New software

Add the ADT plugin https://dl-ssl.google.com/android/eclipse/

SELECT from available options and install Android ADT for Eclipse.


These links can also help:

http://developer.android.com/sdk/

http://developer.android.com/sdk/eclipse-adt.html http://developer.android.com/sdk/installing.html


Then open Eclipse and Window menu > Android Virtual Device Manager


4-      Installing Android Samples


Open Eclipse Window menu > Android SDK Manager


From here you can select samples for any version of Android SDK that you want to go with, I would recommend

  • ·         Android 4.2.2 (API 17) latest version with most recent feature or
  • ·         Android 2.2 (API 8)


This pretty much what you need to start with Android development, do visit again for more quick and easy articles to get hands-on approach for beginners.


Thanks,
Web Editor


TSQL First_Value and Last_Value functions usage in SQL 2012

SQL Server 2012 introduces two new analytical functions FIRST_VALUE and LAST_VALUE.

  • FIRST_VALUE returns the first value in an ordered set of values and
  • LAST_VALUE returns the last value in an ordered set of values

The syntax for these functions are:

FIRST_VALUE \LAST_VALUE ( [scalar_expression )
    OVER ( [ partition_by_clause ] order_by_clause rows_range_clause )

Let me explain this using an example.

The following script creates a test table and some test data.

CREATE DATABASE [TestDB]
--Create testable to hold some data
CREATE TABLE [dbo].[Test_table](
 [id] [int] IDENTITY(1,1) NOT NULL,
 [Department] [nchar](10) NOT NULL,
 [Code] [int] NOT NULL,
 CONSTRAINT [PK_Test_table] PRIMARY KEY CLUSTERED
(
 [id] ASC
)WITH (PAD_INDEX = OFF, STATISTICS_NORECOMPUTE = OFF, IGNORE_DUP_KEY = OFF, ALLOW_ROW_LOCKS = ON, ALLOW_PAGE_LOCKS = ON) ON [PRIMARY]
) ON [PRIMARY]
GO
--Insert some test data
insert into Test_table values('A',111)
insert into Test_table values('B',29)
insert into Test_table values('C',258)
insert into Test_table values('D',333)
insert into Test_table values('E',15)
insert into Test_table values('F',449)
insert into Test_table values('G',419)
insert into Test_table values('H',555)
insert into Test_table values('I',524)
insert into Test_table values('J',698)
insert into Test_table values('K',715)
insert into Test_table values('L',799)
insert into Test_table values('M',139)
insert into Test_table values('N',219)
insert into Test_table values('O',869)

So our table data will look like:

Now the query for FIRST_VALUE and LAST_VALUE will be:

SELECT id,department,code,
FIRST_VALUE(code) OVER (ORDER BY code) FstValue,
LAST_VALUE(code) OVER (ORDER BY code) LstValue
FROM test_table

Here are the results:

In the above example FIRST_VALUE is the same and equal to the value in the first row (i.e. 15) for the entire result set. While the LAST_VALUE changes for each record and is equal to the last value that was pulled (i.e. current value in the result set).

Get Same Last Value for All Records

If we want the Last Value to remain the same for all rows in the result set we need to use ROWS BETWEEN UNBOUNDED PRECEDING AND UNBOUNDED FOLLOWING with the LAST_VALUE function as shown below.

SELECT id,department,code,
FIRST_VALUE(code) OVER (ORDER BY code) FstValue,
LAST_VALUE(code) OVER (ORDER BY code
ROWS BETWEEN UNBOUNDED PRECEDING AND UNBOUNDED FOLLOWING) LstValue
FROM test_table

Here are the results:

Getting Different First And Last Values By Groups

Now let’s use these functions with the PARTITION BY clause. The partition by clause divides the result set produced by the FROM clause into partitions to which the function is applied. If not specified, the function treats all rows of the query result set as a single group, as we saw in last example. To test this we will insert some more test data where values for department will be duplicated.

insert into Test_table values( 'A',51)
insert into Test_table values( 'A',111)
insert into Test_table values( 'A',169)
insert into Test_table values( 'A',514)
insert into Test_table values( 'B',5331)
insert into Test_table values( 'B',12211)
insert into Test_table values( 'B',101)
insert into Test_table values( 'B',135)

Now the query will look like this:

SELECT id,department,code,
FIRST_VALUE(code)  OVER (PARTITION BY department ORDER BY code) FstValue,
LAST_VALUE(code) OVER (PARTITION BY department ORDER BY code) LstValue
FROM test_table

So the output would be:

Now the result set is divided into partitions based on the department, so the FIRST_VALUE is different but the same for each partition, while the LAST_VALUE changes for the last row in that partition.

SQL Server – Stepwise configruation of Transactional Replication

There are 3 steps involved for Configuring the Transactional Replication:

1.Configuring the Distribution Database.

A database which contains all the Replication commands. Whenever any DML or DDL schema changes are performed on the publisher, the corresponding commands generated by SQL Server are stored in the Distribution database. This database can reside on the same server as the publisher, but it is always recommended to keep it on a separate server for better performance. Normally, I have observed that if you keep the distributoion database on the same machine as that of the publisher database and if there are many publishers then it always has an impact on the performance of the system. This is because for each publisher, one distrib.exe file gets created.

2.Creating the publisher.

The Publisher can be referred to as a database on which the DML or DDL schema changes are going to be performed.

3.Creating the subscriber.

The Subscribers the database which is going to receive the DML as well as DDL schema changes which are performed on the publisher. The subscriber database normally resides on a different server in another location.
How it works

Transactional replication is implemented by the Snapshot Agent, Log Reader Agent, and Distribution Agent. The Snapshot Agent prepares snapshot files containing schema and data of published tables and database objects, stores the files in the snapshot folder, and records synchronization jobs in the distribution database on the Distributor.

The Log Reader Agent monitors the transaction log of each database configured for transactional replication and copies the transactions marked for replication from the transaction log into the distribution database. The Distribution Agent moves the initial snapshot jobs and the transactions held in the distribution database tables to Subscribers.

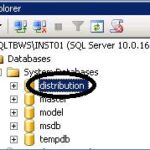
Configuring the Distribution Database

T-SQL script to REFRESH all views in a SQL Server Database

T-SQL script to refresh all VIEWS in DATABASE.

declare c cursor for
select name from sysobjects where type = 'v' and uid = 1
open c
declare @ViewName varchar(500)
fetch next from c into @ViewName
while @@fetch_status = 0
begin
BEGIN TRY
exec sp_refreshView @viewName
END TRY
BEGIN CATCH
print @viewName
END CATCH
fetch next from c into @viewName
end
close c
deallocate c

SQL 2005 System Objects for getting information about Transaction Locks

SQL 2005 System Objects for getting information about Transaction Locks

sys.dm_tran_locks:
Shows us all locks held on all resources for all transaction. We start from this view since we want to get information about locked resources.
sys.partitions:
Contains information about partitions in the database. We can join it to the sys.dm_tran_locks on the hobt_id only for resource_type values ‘HOBT’, ‘Page’, ‘RID’  and ‘Key’. With this join we get the object_id of our locked table.
sys.objects:
Contains data for all schema scoped database objects. We join it to sys.partitions to get the Name of the locked object which is usually a table name.
sys.dm_exec_sessions:
Shows data about all active sessions on SQL server. We join it to sys.dm_tran_locks to get user login information for each held lock.
sys.dm_tran_session_transactions:
Shows data for all transactions for a session. By joining in to sys.dm_exec_sessions we get a link to all active transactions in the session.
sys.dm_tran_active_transactions:
Shows data for all active transactions in SQL Server. By joining it to sys.dm_tran_session_transactions we only get information for the session we want.
sys.dm_exec_connections:
Shows data for all connections in SQL Server. By joining it to sys.dm_exec_sessions we get connection info for our session.
sys.dm_exec_sql_text:
Returns SQL statement that is associated with the SQL handle input parameter. By cross applying it to the sys.dm_exec_connections we get the last executed statement for the connection, which in our case is the statement that is holding locks.

01.SELECT L.request_session_id AS SPID,
02. DB_NAME(L.resource_database_id) AS DatabaseName,
03. O.Name AS LockedObjectName,
04. P.object_id AS LockedObjectId,
05. L.resource_type AS LockedResource,
06. L.request_mode AS LockType,
07. ST.text AS SqlStatementText,
08. ES.login_name AS LoginName,
09. ES.host_name AS HostName,
10. TST.is_user_transaction as IsUserTransaction,
11. AT.name as TransactionName,
12. CN.auth_scheme as AuthenticationMethod
13.FROM sys.dm_tran_locks L
14. JOIN sys.partitions P ON P.hobt_id = L.resource_associated_entity_id
15. JOIN sys.objects O ON O.object_id = P.object_id
16. JOIN sys.dm_exec_sessions ES ON ES.session_id = L.request_session_id
17. JOIN sys.dm_tran_session_transactions TST ON ES.session_id = TST.session_id
18. JOIN sys.dm_tran_active_transactions AT ON TST.transaction_id = AT.transaction_id
19. JOIN sys.dm_exec_connections CN ON CN.session_id = ES.session_id
20. CROSS APPLY sys.dm_exec_sql_text(CN.most_recent_sql_handle) AS ST
21.WHERE resource_database_id = db_id()
22. ORDER BY L.request_session_id

T-SQL Script to enable/disable Cross-Database Chaining

T-SQL script to enable Cross Database Chaining in Microsoft SQL Server through query analyzer:

Use [MY_DATABASE_NAME]
GO
ALTER DATABASE [MY_DATABASE_NAME]
SET DB_CHAINING ON
GO
EXEC sp_grantdbaccess 'GUEST'
GO
Grant CONNECT to GUEST
GO
Grant SELECT to GUEST
GO

* Use the following command to allow cross-database ownership chaining in all databases:

EXEC sp_configure 'Cross DB Ownership Chaining', '1'; RECONFIGURE

* Configure cross-database ownership chaining at the database level with the new db chaining option for sp_dboption. When this option is set to false, the database cannot participate in cross-database ownership chaining as either the source or the target database. When this option is set to true, the database can participate in a cross-database ownership chain.

EXEC sp_dboption  [MY_DATABASE_NAME], 'db chaining', 'true'

* To find out if DB_Chaining is congifured on which DATABASES on current server instance:
SELECT [name] AS [Database], [is_db_chaining_on] FROM [sys].databases ORDER BY [name]; 

Thanks,
Web Editor

TSQL – Large table cleanup with minimal locks

Your SQL Server production database must be available 7×24 but it contains millions of obsolete rows which hurt performance.  How do you delete these rows without the lock contention and business impact of a standard delete?  In this tip we look at how you can delete massive number of rows in small minimal lock batches.

Solution

Quick OLTP is critical to a business’s success so DBAs need to mindful of data contention caused by application cleanup jobs.  One approach is to select a huge number of keys in one pass then break the cleanup into small batches with commits and sleep windows to minimize contention.  I recommend enabling the cleanup in a SQL job and run at low system usage time.

This is accomplished with the T-SQL code below.  You would customize the definition of obsolete rows (I call deadheads) to your shop. In this case a sale without money and no contact is obsolete.  Historical cleanup is a common use of this routine.  This version works with multiple tables in this case a parent table and its two child tables.  The column SalesID relates the tables.

Two layers of temporary tables are used: the outer table to contain all the obsolete primary keys for this run; the inner table to contain a subset of the same.  The number of keys placed in the temporary tables is best determined by altering the number of rows until the highest rows deleted per minute is reached.  I started with 1,000 rows in the outer table and 100 in the inner table.  I slowly scaled up to 500,000 rows in the outer table and 5,000 rows in the inner table.  25,316 deletions per minute was the peak value.  Beyond 500,000 rows in the outer table the deletion per minute value declined on my server.

Since the application tables are defined with primary keys using the identity property the rows are inserted with ever increasing primary key values making it easy to pick up the oldest rows via SELECT top.  Your case may be based upon a date column so alter the SELECT top 500000 accordingly.

The code loops through the 500,000 row outer table loading 5,000 keys values into the inner table.  Those 5,000 rows are then deleted from the application tables and outer table. The last step is to truncating the inner table.  This loop continues until all 500,000 outer table rows are deleted.  I find keeping the inner table small (5000) minimizes lock contention but you will need to adjust this number to your shop.

If desired use the WAITFOR command to pause processing and allow other applications to process without contending with cleanup.

At any point the job can be cancelled resulting in a brief rollback only for the last inner table set of keys. Committed deletes are not rolled back.

The job can be restarted from the top without issue and can be run as many times a day as needed.  I run this job two times a night on tables needing a quick cleanup then pull back to once a week to maintain optimal performance.

USE [msdb]
GO
/****** Object: StoredProcedure [dbo].[usp_ObsoleteRowCleanup] Script Date: 12/18/2011 14:00:38 ******/
SET ANSI_NULLS ON
GO
SET QUOTED_IDENTIFIER ON
GO

/********************************************************************

File Name: usp_ ObsoleteRowCleanup.sql
Applies to: SQL Server 2005/8
Purpose: To cleanup obsolete rows.
Prerequisite: None.
Assumption: Removal of obsolete rows improves performance
Parameters: None
Returns: 0 = Succesful, 1 = Errors.
Author: Edward A. Polley
Spec
— Definition of deadhead.
Select COUNT(*) from SalesLead L, Transaction T
WHERE L.SalesID = T.SalesID
AND L.ContactId IS NULL
AND T.MoneyIn = 0

********************************************************************/
CREATE PROCEDURE [dbo].[usp_ ObsoleteRowCleanup]
–Will delete first 500000 deadheads
–Delete is from child tables: SalesZip and Transaction then parent SalesLead

AS

SET NOCOUNT ON
SET QUOTED_IDENTIFIER OFF

DECLARE
@DeadHeadCnt int,
@Toprow int

BEGIN
PRINT ‘Building Outer Temp Tbl ‘
PRINT getdate()

CREATE TABLE #OuterTemp(SalesID bigint) — hold all deadhead keys
CREATE INDEX IX_OuterTemp_SalesId on #OuterTemp (SalesID)

CREATE TABLE #InnerTemp(SalesID bigint) — hold subset of deadhead keys
CREATE INDEX IX_InnerTemp_SalesID on #InnerTemp (SalesID)

INSERT INTO #OuterTemp — select first 500,000 keys
Select TOP 500000 L.SalesID from YourDB.dbo.SalesLead L (Nolock),
YourDB.dbo.Transaction (Nolock) T
WHERE L.SalesID = T.SalesID
AND L.LeadContactId IS NULL -–substitute your condition
AND T.MoneyIn = 0
OPTION (MAXDOP 8); — allow parallel processing
— mainline
Select @DeadHeadCnt = count(*)From #OuterTemp
PRINT ‘Number of Dead Heads’
PRINT @DeadHeadCnt

While @DeadHeadCnt > 0
BEGIN
PRINT ‘Begins deletes ‘
PRINT getdate()
PRINT ‘Top row ‘
SELECT @toprow = min(SalesID) From #OuterTemp — ever incr key
PRINT @toprow

BEGIN TRANSACTION
INSERT INTO #InnerTemp — experiment with this value
Select TOP 5000 SalesID from #OuterTemp

— Delete from application tables by processing small intertemp
DELETE from YourDB.dbo.SalesZIP where SalesID in
(Select SalesID from #InnerTemp (nolock) ); –innertemp

DELETE from YourDB.dbo.Transaction where SalesID in
(Select SalesID from #InnerTemp (nolock) ) ;

DELETE from YourDB.dbo.SalesLead WHERE SalesID in
(Select SalesID from #InnerTemp (nolock) );

— Delete from outer table
DELETE from #OuterTemp WHERE SalesID in
(Select SalesID from #InnerTemp (nolock) ) ;

Select @DeadHeadCnt = count(*)From #OuterTemp — reset loop cnt
TRUNCATE TABLE #InnerTemp — cleanup working table

COMMIT

–WAITFOR DELAY ’00:00:01’ — adjust as needed

PRINT ‘End Deletes’
END
— Destroy all temporary tables.
IF OBJECT_ID(‘tempdb..#OuterTemp’) IS NOT NULL
DROP TABLE #OuterTemp

IF OBJECT_ID(‘tempdb..#INNERTEMP’) IS NOT NULL
DROP TABLE #InnerTemp
END
GO